How to use 1stFlip Flipbook Creator Pro for Mac to convert PDF files to flipbooks and upload flipbooks online?
Just do like the followings Get PDF version
Download, install and run 1stFlip Flipbook Creator on your Mac or Windows.


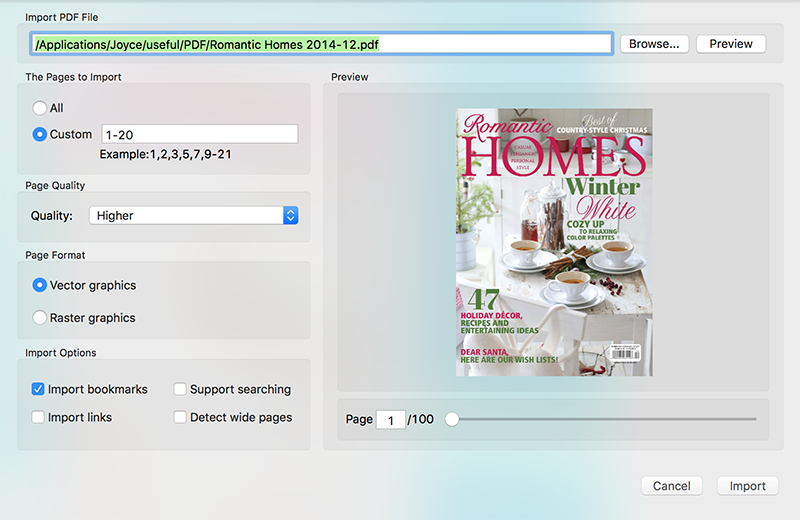
1. Click the Import button. Click Browse button to choose PDF files you want to convert. You can click Preview button to open the chosen PDF file and clarify.
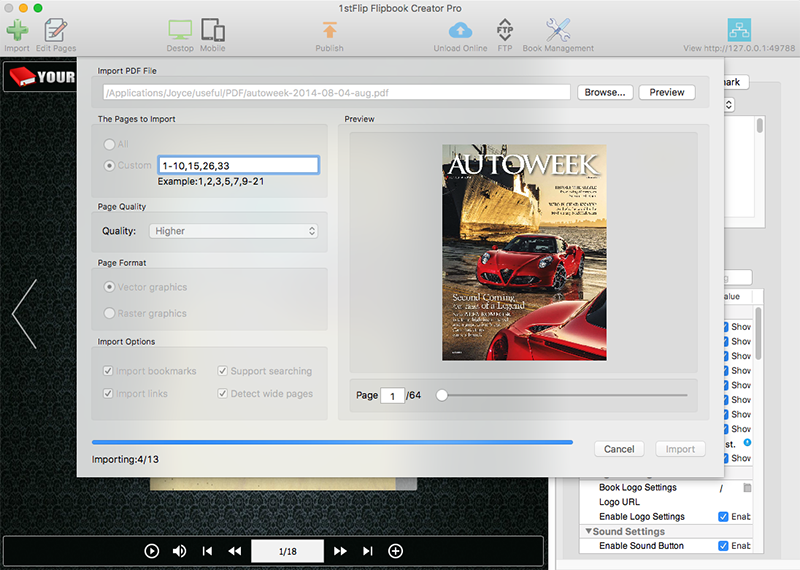
2. Select page ranges to import: all or customize certain pages. Don’t know which pages to import? The Preview window allows you to view each page of the PDF file.
3. Set page quality: Higher, High, Medium, Low and Lower.
4. Choose page format: Vector(.swf) or Raster(.jpg).
5. Other import options:
After all these settings, click Import button. Then you can see the PDF file in the interface. Now the page-flipping effect is added; what you see in the display area is what your flipbook looks like after creation, so you may want to make some changes.

Click the Import images button:

Click  to add images,
  to remove unwanted ones,
 ![]() to delete all,
to delete all,  and
and  to adjust orders.

Set the image quality and click Import.

The biggest difference between the ordinary version and the Pro version is that you can edit any page or add PDF and image as new pages. Click Edit Pages button to open the below window:

As you can see from above window, it allows you to:
Click the Add Line button below and draw a line anywhere you want. Under the Setting tab you can choose Line Type, Line Color, Line Width and Line Alpha.

Click the Add Shape button and choose the one you need.

Click any one of them and draw on the page:

Click the Add Action button to open the below window and select trigger event and action for any shape you added.

Click the Add Callout button, choose callout style and draw on the page. Double click it to enter your text. Under the setting tab you can set Border, Fill and Font parameters and Add Action.

Add Text
Click Add Text button and click on the page, enter your text. Set font, size, color, etc. on the right side.

Add Image
Click the Add Image button and click on the page. Click the replace button on the right side to choose your own image.

Drag the red square on the image corner to change the size. Under the Setting tab you can set image Border, Alpha value and action.

Add Music
Click the Add Music button and click on the page to bring the music player. Click replace button on the right and choose a local MP3 file. The song name will be auto-captured. You can set the music player background color and font size.

Play the music.

Add Video
Click the Add Video button and draw a rectangle on the page to bring the video player, click replace button on the right and choose a local video. Set Control Panel color and Poster image on the right side.

Add YouTube Video
Click Add YouTube Video button and draw a rectangle on the page to bring the video player, open the video you want to embed to flipbook in browser and copy the code after v= of the URL to the right side of the below window. For example, if the URL of the YouTube video is https://www.youtube.com/watch?v=2Rp6qzO0TmI, copy and paste 2Rp6qzO0TmI to the Youtube Video ID area.

Click ![]() and save the project. After convert to local flipbook or upload online, you can then view the YouTube video within the flipboook.
and save the project. After convert to local flipbook or upload online, you can then view the YouTube video within the flipboook.

Add chart
Click Add chart button, choose one chart type and draw a rectangle on the page.


Edit chart data:

Add Number icon
Click Add Number icon button, choose one style and click on the page.


Add Button
Click Add Button button, choose one style and click on the page to add buttons.
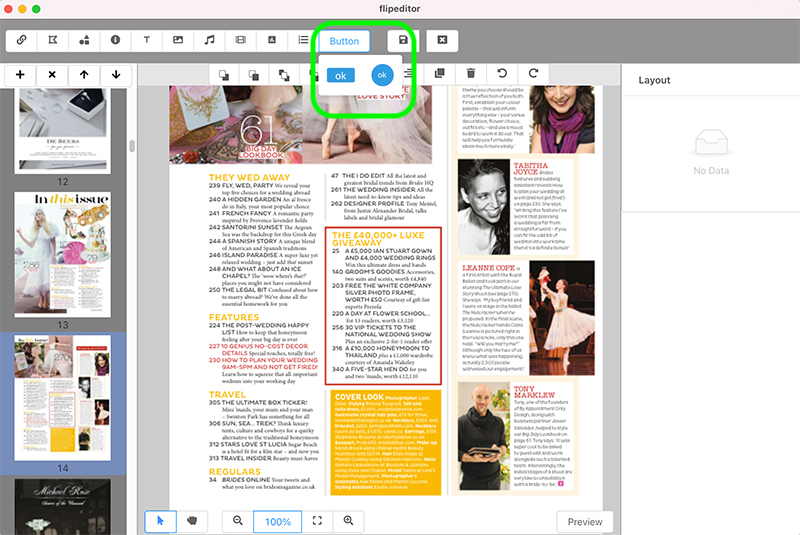
You can change the title, font and font size.

Undo&Redo
Click ![]() to Undo and click
to Undo and click ![]() to Redo.
to Redo.
At last, click ![]() to save project and click
to save project and click ![]() to exit Page Editor.
to exit Page Editor.
As you can see in the right side of the interface, there are 3 tabs: Setting, Scene, and bookmark, where you can customize your flipbooks for the best reading effect.
1. Setting. This tab contains two parts: Template and detailed settings.

Template means how the flipbook toolbar is displayed. Here are two categories: Geometry and Texture, contains 5 samples respectively. Choose one you like.
Besides, you can export and import samples.
The detailed settings give you more options to customize templates as you like.

Book Logo Settings - Add your image logo to the top left corner of the flipbook.
Click the folder icon to choose logo files.
![]()
Sound Settings - Add background music to the flipbook. Click the folder after Sound File to select audio files.

The number -1 means play the background music all the time. Set N(N>0): Play N times then stop.
Zoom Config - Set whether the flipbook can be zoomed in or not. The minimum and maximum width can be set as you like.

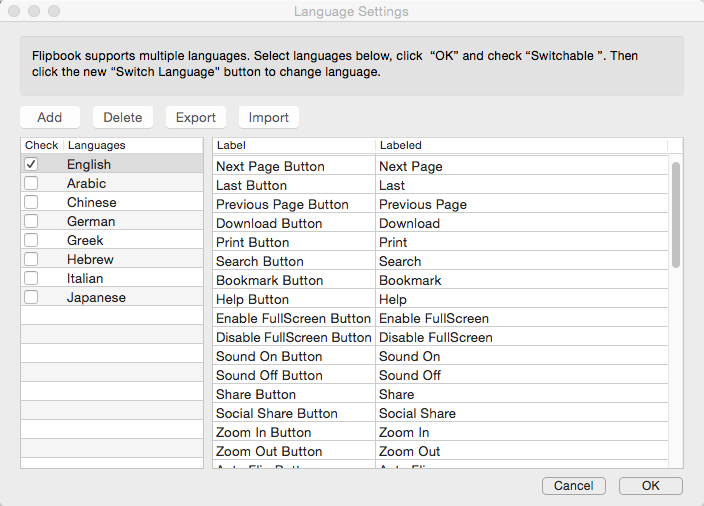
Language Settings - Texts on the toolbar of the flipbook support multiple languages, which can be switchable.

Click the circle icon on the right side to open the below window:

Here are 8 languages for you to choose. Check the ones you want, click OK and then check the above Switchable option. You will find the below Switch Language icon appears.
Click the Switch Language icon to change languages of toolbar text conveniently.

Auto Flip Settings - Flipbooks can flip automatically. Enable Auto Flip and set Flip Interval, Flip loops: set -1: Auto flip all the time; set N (N>0): Flip N times then stop. Check Auto Flip from start to make the flipbook flip automatically from start. Click the Auto Flip Button when you need if you don't check this option.

Check Auto Flip Button and you will see the below icon.

![]()
Flash Display Settings - include page thickness, page-flipping effect of the page corner (None to largest), background transparency (0-1), position of the book in the preview window, mouse tracing effect, show thumbnails window or not, color of the toolbar, background color of the thumbnails and page, make right-to-left page-flipping window, show double pages at first, add hard cover, set flip time, whether to flip page with mouse wheel.

Flash Font Settings - set font, font color, and page number color.

Flash Background Color - set color for the flash background.

Flash Background File - or select your background file and set the position.


If you have chosen a scene, you need to click the None Scene to make the background file appear.
Flash Book Size - set size of the flipbook.

Flash Page Number - set page number.

Flash Minime Style - show flipbooks without toolbar when embedding to a small area of webpages.

Privacy Settings - add password to protect your flipbook content.

You can set the same password for all readers.

or one unique password for each reader.

Flash Control Settings - set color of the link when mouse over, how to open new windows, whether links are available after zooming in, add your Google Analytics ID for tracking the traffic of the flipbook.

2. Scene
Choose a dynamic scene for your flipbook to make it more attractive.

3. Bookmark
Check the Import bookmarks option when importing PDF to import all bookmarks from the original PDF.
You can also edit the bookmarks on the right.

Click the Insert Pages button on the left to insert any image or PDF page to the existing flipping book.

You can choose to add the new page before or after the selected page, or to the top and bottom of the flipbook.

Click the Delete the selected button to delete any unwanted page, or click the Move up and Move down button to adjust page order.
1stFlip FlipBook Maker Responsive Design Mode enables you to easily preview what your flipbook looks like across mobile devices and customize mobile HTML5 flipbooks.
Select different device icon to preview your flipbook. Click the icon once again to switch between portrait and landscape perspective.
Here are two page turning styles for you to choose: Flip and Slide.
Customize flipbook background color, background image or choose the pre-designed themes. Change toolbar and button colors as you like.


Here are two page flip modes for you to choose: Flip and Slide.
Page width and height will show automatically.

But you can customize flipbook size as you like:

Then you can embed link, button, text, image, video, audio, etc. to the blank areas with Page Editor.

Toolbar Settings:

You can control which buttons appears on the toolbar.

Customize flipbook toolbar color and transparency, sliderbar/button icon/button text default and responsive color.


Add your logo to the flipbook.

After all above settings, click Convert button to open the below window:

1.Choose the output format.
1stFlip Flipbook Creator Pro for Mac support 4 formats of flipbooks: .html, .zip, .app and .exe.
You will get the following files respectively after choosing .html, .zip, .app, .exe format:

2. Flash-HTML5, Flash only or HTML5 only
If you want to display Flash flipbook on desktop/laptop and HTML5 flipbook on mobile devices, choose Web Standards as Flash-HTML5. If you want to publish pure HTML5 flipbooks, choose HTML5 only.
3. Set the output path and file name, then click Publish button to start the convert.
Click Batch button:


Click Add button to choose PDF files you want to convert.

If you want to apply the same settings to all flipbook, click Advanced button:

You can set page ranges, import options, quality, format, output format, output directory, flipbook name, title, languages and template, then click Apply button.
After all these settings, click Start button.
If you want to use different settings to each flipbook, do the following:
Click ![]() to set PDF page ranges, quality, format and import options for the selected PDF.
to set PDF page ranges, quality, format and import options for the selected PDF.

Click ![]() to set output format and output directory for the select PDF.
to set output format and output directory for the select PDF.

Click ![]() to choose template for the selected PDF.
to choose template for the selected PDF.

Click ![]() to add multiple languages for the output flipbook.
to add multiple languages for the output flipbook.
1. After importing PDF and customize templates and scenes, click the Publish Plugin button to open the below window:

Enter plugin name and title of the flipbook, or you can set size of the flipbook, then click Publish. Also you can choose to publish Joomla or Drupal module.
After publishing, install the plugin or module to your WordPress, Joomla or Drupal site.
1. 1stFlip Flipbook Creator Pro for Mac allows you to upload any flipbook to your own hosting server with the built-in FTP client.

2. Enter your ftp address in the Address area and then click Upload.
The Convert button is to make local flipbooks and upload to own website. If you don't have a website, use the Upload button to directly publish the flipbook online, then readers can easily access your flipbooks online.
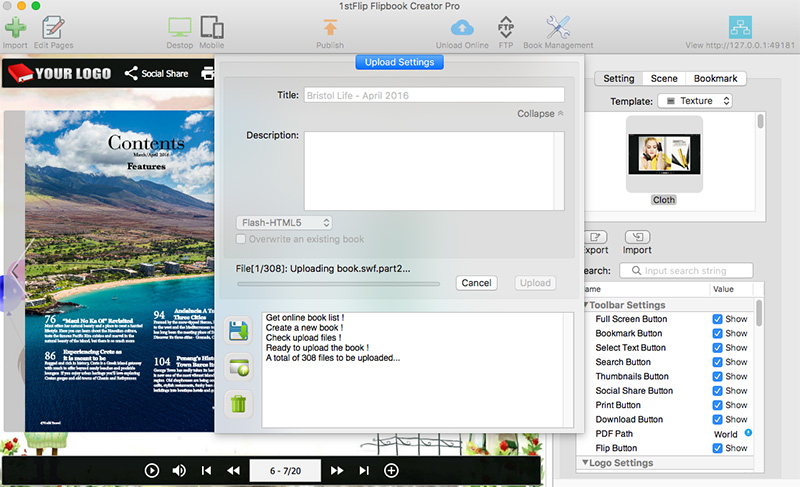
If you choose to upload your flipbooks to 1stFlip Server, you don’t need to click the Convert button. After finishing all of the settings, click the Upload button.
1. You need to create an account with your email first.

2. Upload the flipbook. You can add some descriptions. Choose Flash-HTML5, Flash only or HTML5 only.

When the upload is finished, you will get the URL of the flipbook. One-click to share the flipbook to social networks or copy the embed code to your website.

4. Click Online Library button and you will see the uploaded flipbook with detailed information.

Here you can create groups to manage flipbooks, set privacy to your flipbooks, add Hot or New tags, etc.

Notice: It costs you one point to upload one flipbook. You will get 5 points after registration. You can click the Purchase link on the right top corner to purchase more points.
Copyright © 2026 1stFlip. ALL Rights Reserved.